How to hookgrip
Master the hook grip for weightlifting! Discover benefits, techniques, and tips to improve your grip and elevate your performance.


Master the hook grip for weightlifting! Discover benefits, techniques, and tips to improve your grip and elevate your performance.
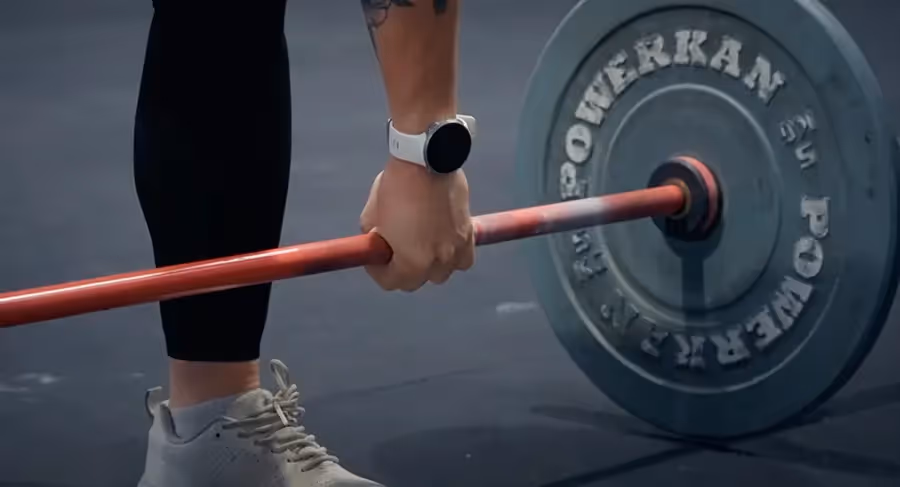
The hook grip is a specialized technique widely embraced by weightlifters, CrossFit athletes, and strength trainers alike.
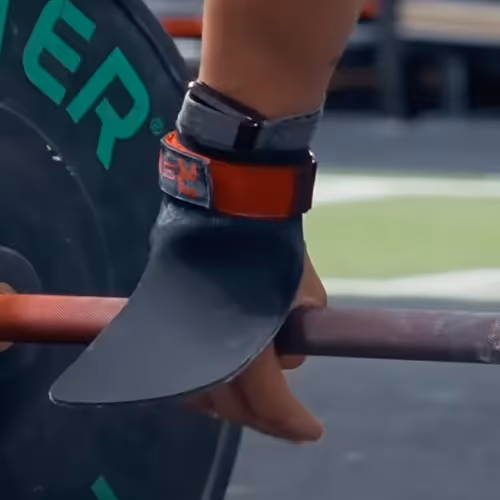
This method provides enhanced grip security by wrapping the thumb around the barbell and securing it with the index and middle fingers, setting it apart from traditional grips.
While the hook grip can significantly boost performance by reducing forearm fatigue and improving force transmission, it may initially cause discomfort.
In this guide, we will explore how to effectively master the hook grip and alleviate any pain it may cause to your hands.
In short the hookgrip consists in wrapping the thumb around the barbell and securing it with the index and middle fingers. The securing of the thumb is what differentiates it from a normal grip.
The hook grip is simply but a technical variation to how you grab onto the barbell.
It’s a technique developed by lifters but also widely utilized by CrossFitters, powerlifters, bodybuilders and functional fitness fans.
When you wrap your thumb over the barbell and under the index and middle fingers you are offloading part of the strain from your forearms while improving overall grip.
This will allow you to hold onto the barbell for longer and pick up heavier weights.
Not only will it reduce fatigue in the forearms but will also take strain away from your shoulders and allow you to better transmit force from the lower body to the barbell.
Making it an essential technique for anyone looking to improve any lift.
As explained previously, to hookgrip you simply wrap your finger around the barbell.
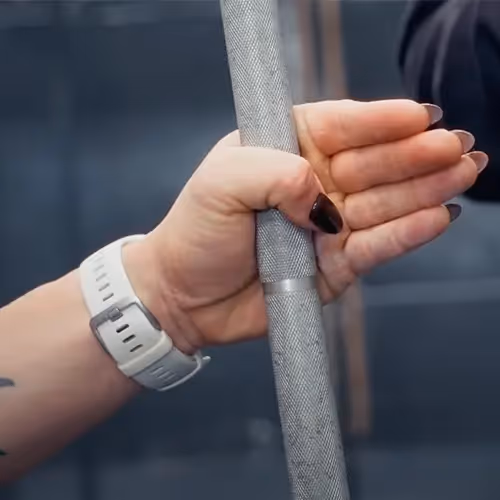
Then you’ll have the choice of securing the thumb by wrapping over it one or two fingers.
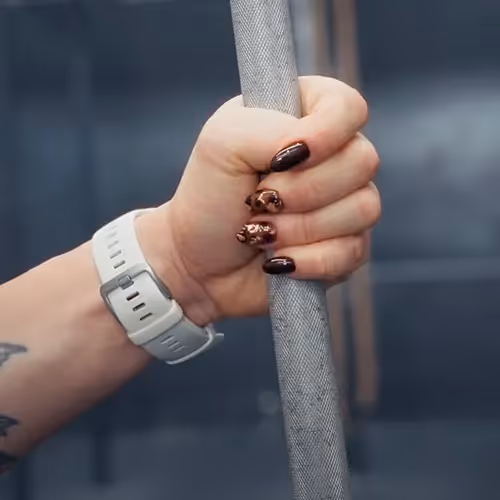
This will depend on how comfortable you are with the technique and on your hand size especially compared to the diameter of the barbell/dumbbell you are using.
If you are struggling the index finger will be enough until you work yourself up to using your middle finger but it’s not mandatory.
Note
The sooner you start hook-gripping the better. This is because the technique requires an initial adaptation phase for your thumb joint.
Therefore, if you are learning to lift “from scratch” you’ll be able to simultaneously adapt your hookgrip while you slowly go up in weight as your technique improves.
However, the hookgrip can be a little uncomfortable at the start, that's why it’s so important to be patient with adaptation when you begin!
But if you find it becomes too distracting that you can’t focus on technique, allow yourself some sessions to fully nail down a new lifting movement before introducing the hookgrip.
Discomfort when hook-gripping will come from the pulling and/or compressing forces being passed onto the thumb.
This is quite normal and not something you shouldn't fear, however to minimize discomfort in the initial stages it’s best to slowly ramp up use of the hookgrip.
This is especially true if you started introducing the hookgrip after you’ve been lifting for quite some time.
Meaning your body can handle much heavier loads than what your thumb has adapted to just yet. But don’t stress, with a little patience this issue can be solved seamlessly.
We recommend using the hookgrip from your first warm up set, even with an empty barbell, and maintain it until you start feeling discomfort.
You can stay in the “discomfort zone” for 2 to 3 sets before switching over to a normal grip.
Note
The pain shouldn’t be increasing with each rep and should quickly come down as soon as you let go of the barbell! Take note of the weight you were at when you transitioned to the normal grip and challenge yourself to go one set heavier the following week.
PRO TIP: to adapt even faster add isometric holds at the end of the lifting section of your session. Take a medium heavy barbell (something you can hold onto for 30” with a normal grip) and with either a snatch or clean width grip pick it up and hold it for 10 to 20”. Repeat for 3 to 5 sets and slowly work yourself up to 30” or heavier weights.
Once discomfort with hook-gripping subsides you’ll find it extremely useful across a variety of applications.
At this point there are a few tips you can implement to make sure you’re getting the most out of this technique:
Always chalk up your thumbs before a lift to ensure maximum efficiency of the hookgrip.
While during a workout, when sweat becomes an inescapable factor, you may not have the time to constantly chalk up, this is where tape comes into play.
You can use zinc tape, but we personally recommend purchasing lifting tape.
Play around with how many rounds to wrap around your thumb to find what works best for you. And don’t forget to chalk your thumb before wrapping for maximum stickiness and durability.
If you’re not mobile enough in the front rack you’ll need to open your hands, releasing your hookgrip to leave the barbell to rest in your palms or even the tip of your fingers. You’ll then have to regrip properly as the barbell comes down for the next rep.
This requires well practiced timing, something which may take some time to nail down especially at heavier weights.
That’s why it's important to practice regripping with a hookgrip while barbell cycling before applying it to a workout.
Spend some time after your lifting session practicing with lighter loads or challenge yourself to apply the technique in a workout even if it means temporarily dropping down in weight. It will be well worth it in the long run!
If you follow all these tips and spend time slowly ramping up weight and reps done with a hookgrip as well as quality practice you’ll be mastering the hookgrip in no time and seeing SIGNIFICANT benefits in your lifting and barbell cycling!
John Singleton, the founder of The Progrm, is known for training elite athletes, including many of Europe’s top CrossFit Games competitors. With a Master’s degree in Osteopathy, John combines science-based programming with a focus on performance and recovery. Based in Mallorca, Spain, he leads a global community dedicated to helping athletes optimize performance and longevity in the sport.

.avif)